A Brief Tutorial On Cartridge Pleating
 If you've been doing
historical costuming for any length of time you've heard of cartridge pleating.
Cartridge pleating is one of the best ways to attach a lot of fabric (or heavy
fabric) to a smaller length of fabric (like a waistband). Once you see it, it's
pretty obvious, but I've heard descriptions that left me confused and headachy.
Here's my attempt at clarifying this process.
If you've been doing
historical costuming for any length of time you've heard of cartridge pleating.
Cartridge pleating is one of the best ways to attach a lot of fabric (or heavy
fabric) to a smaller length of fabric (like a waistband). Once you see it, it's
pretty obvious, but I've heard descriptions that left me confused and headachy.
Here's my attempt at clarifying this process.
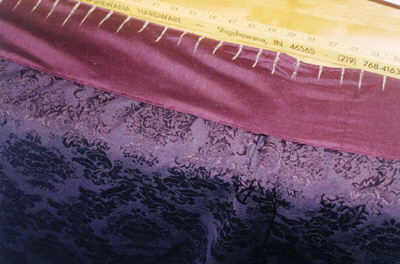
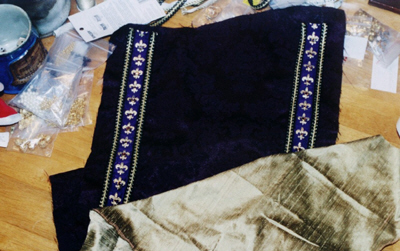
First: Finish off the top edge of your skirt. I like to put a wide facing along
the top edge with a bit of interfacing to add stiffness. For Elizabethans, you
are supposed to look like you have huge hips- it was the fashion. Then mark the
top edge at regular intervals (I marked mine at one inch intervals)
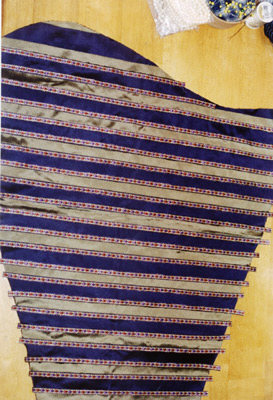
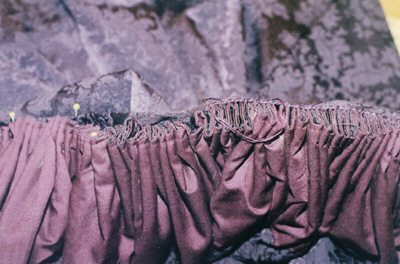
 Next take
some really strong thread (carpet or upholstery thread is best, but two lengths
of button thread will work too), make sure it matches the fabric as it will
remain in place after the skirt is finished, and run it in and out thru the
measured marks. The width between your marks will determine how big your pleats
will be. If you are using relatively thin fabric you will want to make your
marks fairly close together, if you are using a thick fabric you will need to
make them farther apart. Also the more fabric you are trying to attach to a
smaller area, the wider apart you will need to make your marks. Unfortunately
much of this will be determined thru trial and error (see my first Queen
Elizabeth dress diary where I initially made the pleats the wrong size for the
fabric) or by experience and learning to eyeball it. Slowly draw the fabric
along the gathering thread to make regular pleats.
Next take
some really strong thread (carpet or upholstery thread is best, but two lengths
of button thread will work too), make sure it matches the fabric as it will
remain in place after the skirt is finished, and run it in and out thru the
measured marks. The width between your marks will determine how big your pleats
will be. If you are using relatively thin fabric you will want to make your
marks fairly close together, if you are using a thick fabric you will need to
make them farther apart. Also the more fabric you are trying to attach to a
smaller area, the wider apart you will need to make your marks. Unfortunately
much of this will be determined thru trial and error (see my first Queen
Elizabeth dress diary where I initially made the pleats the wrong size for the
fabric) or by experience and learning to eyeball it. Slowly draw the fabric
along the gathering thread to make regular pleats.
 At regular
intervals on the finished waistband and the top edge of the skirt (before
pleating) put large headed pins to mark where the two pieces of fabric should
come together. I like to put pins at half, quarter, and eighths of the length
and then match them up during the gathering process. Remember to leave several
inches unpleated at the front of the skirt, especially if it's going to open in
the front. The 3 or 4 pleats closest to the front opening should be smaller than
the majority of the pleats too, this gives a smoother transition from flat front
to pleated sides and back
At regular
intervals on the finished waistband and the top edge of the skirt (before
pleating) put large headed pins to mark where the two pieces of fabric should
come together. I like to put pins at half, quarter, and eighths of the length
and then match them up during the gathering process. Remember to leave several
inches unpleated at the front of the skirt, especially if it's going to open in
the front. The 3 or 4 pleats closest to the front opening should be smaller than
the majority of the pleats too, this gives a smoother transition from flat front
to pleated sides and back
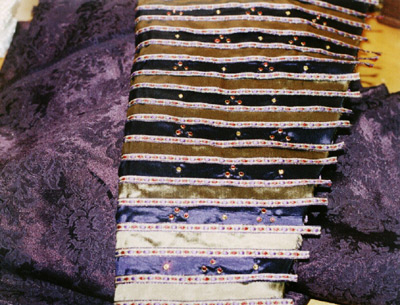
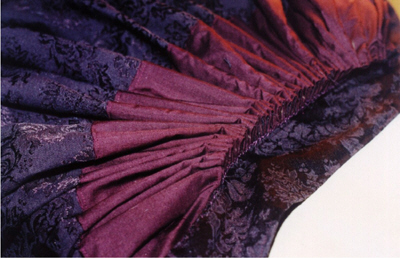
Now take some more of your really strong thread and sew the point of the pleats
to the previously finished waistband. Use a whip/overcast stitch and sew double
thru each of the pleats and once between the pleats on just the waistband. I'm
not sure why this is necessary but it seems to make the pleats stay in place
better. If you have very tightly packed pleats, you will be making lots of tiny,
close stitches! If you look at the photo, you will see, from left to right, how
the pleats become more regular after they have been sewn onto the waistband.
 When it's
all done, it looks like this. The side with the facing where the pleats protrude
is worn on the inside. I know that sounds obvious, but I am trying to make this
idiot proof, because I don't want people making idiot mistakes the way I did the
first couple of times I tried this. It's easy once you know the
secret........And in case you are wondering, yes, you do have to sew most of
this by hand. If anyone figures out how to sew the skirt to the waistband by
machine, please let me know! Actually, it's not bad to do the sewing by hand,
once you have all the prep work done and the pleats pinned to the waistband, you
can throw in your favorite costume drama in the DVD player and sit and sew. It's
kinda relaxing. Don't remove the gathering thread, it will help the pleats hang
properly.
When it's
all done, it looks like this. The side with the facing where the pleats protrude
is worn on the inside. I know that sounds obvious, but I am trying to make this
idiot proof, because I don't want people making idiot mistakes the way I did the
first couple of times I tried this. It's easy once you know the
secret........And in case you are wondering, yes, you do have to sew most of
this by hand. If anyone figures out how to sew the skirt to the waistband by
machine, please let me know! Actually, it's not bad to do the sewing by hand,
once you have all the prep work done and the pleats pinned to the waistband, you
can throw in your favorite costume drama in the DVD player and sit and sew. It's
kinda relaxing. Don't remove the gathering thread, it will help the pleats hang
properly.
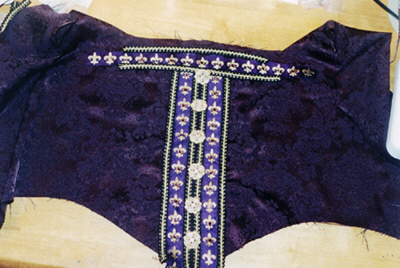
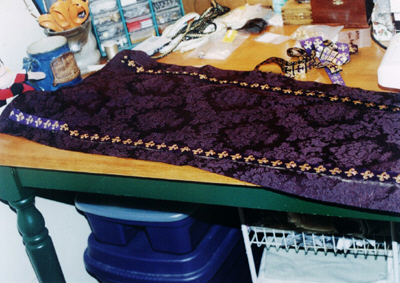
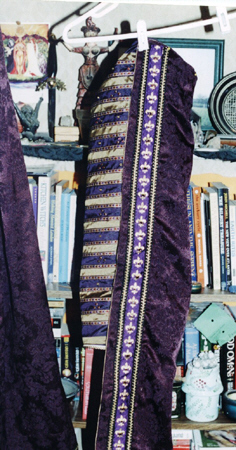
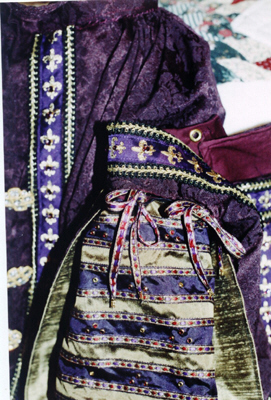
 And here's
what the skirt looked like before I got the big honkin' rhinestone buttons sewn
on it.
And here's
what the skirt looked like before I got the big honkin' rhinestone buttons sewn
on it.
 Now the bodice, under
sleeves, and skirt are finished, I just have to finish the hanging sleeves. I
love hanging sleeves. I will admit that putting hanging sleeves on a French
bodice was not typical of the period, but there are one or two portraits that
show it. That's good enough for me!
Now the bodice, under
sleeves, and skirt are finished, I just have to finish the hanging sleeves. I
love hanging sleeves. I will admit that putting hanging sleeves on a French
bodice was not typical of the period, but there are one or two portraits that
show it. That's good enough for me!
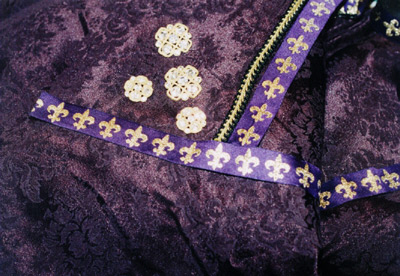
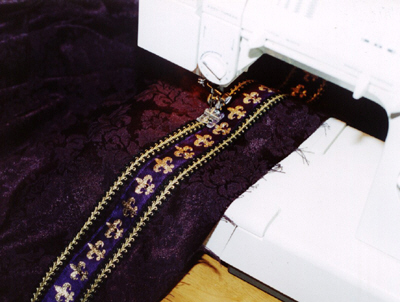
These sleeves are designed to hang open. I couldn't close them if I wanted to.
Many styles of hanging sleeve did actually close functionally... these are not
them. I put the vertical fleur-de-lis trim along the front edges and the
horizontal trim along the bottom along with the gold and black braid.
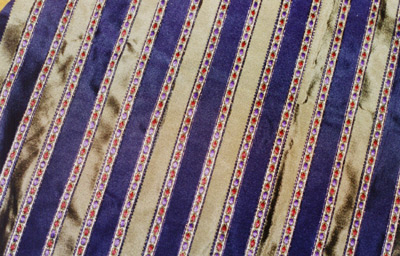
 I lined the sleeve with
an antique gold dupioni silk so that there will be some texture and shine but no
additional pattern. There's a lot of pattern in the dress fabric and sleeves so
I didn't want it to be too much.
I lined the sleeve with
an antique gold dupioni silk so that there will be some texture and shine but no
additional pattern. There's a lot of pattern in the dress fabric and sleeves so
I didn't want it to be too much.
 I sewed the hanging
sleeves into the shoulder of the bodice by hand. It's the best way to get a
smooth seam and a good hang.
I sewed the hanging
sleeves into the shoulder of the bodice by hand. It's the best way to get a
smooth seam and a good hang.
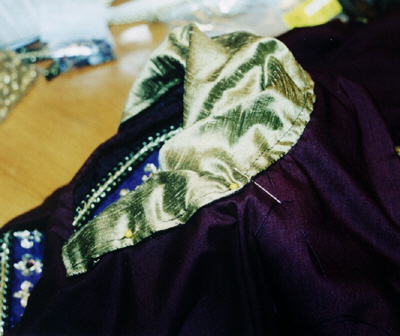
 Here's what the sleeve
looked like before sewing it into the bodice. The top curve goes just in front
of the round of the shoulder and the bottom part of the curve goes under the
arm.
Here's what the sleeve
looked like before sewing it into the bodice. The top curve goes just in front
of the round of the shoulder and the bottom part of the curve goes under the
arm.
 Here's a preview of
what the two sleeves will look like together.
Here's a preview of
what the two sleeves will look like together.
 I took small gold
filigree beads and tipped the ribbons on the under sleeves. They are subtle but
give it a nice finished look without adding bulk.
I took small gold
filigree beads and tipped the ribbons on the under sleeves. They are subtle but
give it a nice finished look without adding bulk.
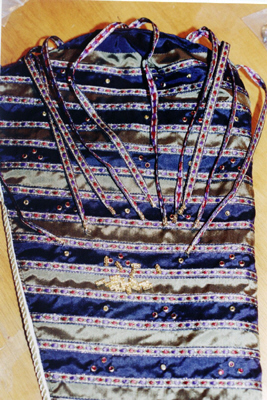
 Here's a close-up of
what the two sleeves look like when worn together.
Here's a close-up of
what the two sleeves look like when worn together.
 Of course, this still
leaves what I will wear on my head. If you will remember back at the start of
this, one of the thing which seemed to confuse the public was the lack of crown.
I am now the proud owner of a rhinestone tiara- who would have thought it? I
will wear it with dressed hair and an antique gold tissue veil. Think I'll look
sufficiently queenly?
Of course, this still
leaves what I will wear on my head. If you will remember back at the start of
this, one of the thing which seemed to confuse the public was the lack of crown.
I am now the proud owner of a rhinestone tiara- who would have thought it? I
will wear it with dressed hair and an antique gold tissue veil. Think I'll look
sufficiently queenly?
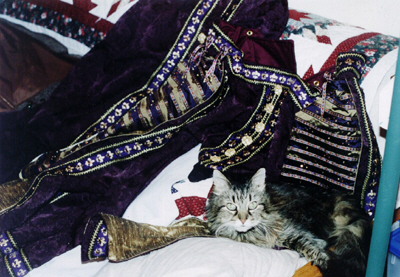 And I know that you
were all worried that I was sewing this without appropriate feline supervision.
Not a problem. Isabeau was watching me every step of the way.
And I know that you
were all worried that I was sewing this without appropriate feline supervision.
Not a problem. Isabeau was watching me every step of the way.
 For anyone who has been
following along, you know that this page is caught in a time warp. I finished
this dress almost a year before this update was posted (9/13/05). Bad me.
Therefore I am able to present to you the dress in it's finished form pretty
much immediately.
For anyone who has been
following along, you know that this page is caught in a time warp. I finished
this dress almost a year before this update was posted (9/13/05). Bad me.
Therefore I am able to present to you the dress in it's finished form pretty
much immediately.
I am pleased to report that the dress did everything I wanted it to do. People
got the hint that the lady in the big purple dress and tiara was probably the
queen. It looked good and was comfortable to wear. The only thing I want to do
is make a pair of stays in eggplant purple silk with gold trim to finish off the
outfit. Standby for another update......but please don't hold your breath!
Here's a full length shot of dress next to the gorgeous fireplace in the
guardroom of the castle.
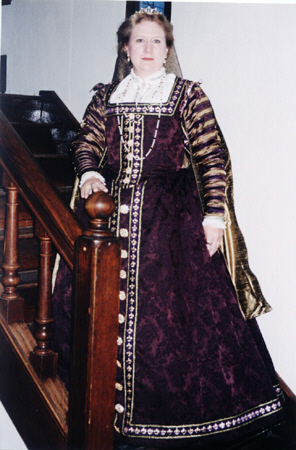 A closer shot on the
stairway so you can see some of the details.
A closer shot on the
stairway so you can see some of the details.
 (To the tune of a
famous Broadway show/movie- everybody sing....)
(To the tune of a
famous Broadway show/movie- everybody sing....)
Don't cry for me Stronghold Castle.....
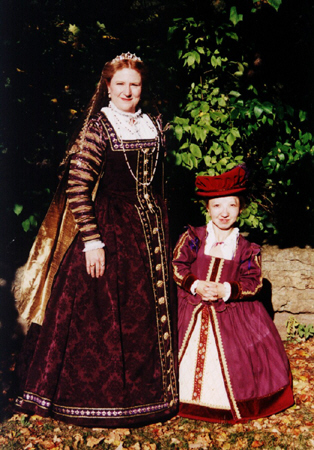 Here's an outdoor shot
with Katherine who plays Thomasina de Paris a woman who was actually in service
to Elizabeth as a jester. Katherine is a complete hoot as Thomasina and does a
great job of keeping everybody in stitches. It's so cool to have a Mini-Me!
Here's an outdoor shot
with Katherine who plays Thomasina de Paris a woman who was actually in service
to Elizabeth as a jester. Katherine is a complete hoot as Thomasina and does a
great job of keeping everybody in stitches. It's so cool to have a Mini-Me!